How to Organize Your Business & Make Time for Your Creative Pursuits

A few months ago, I was having dinner with a friend who works at one of the Big Four accounting firms in New York City. I remember her telling me about all the passion projects she did not have the time or energy to devote to once she’d get home from the office.
Despite now having the freedom to decide my hours, I could still relate to my friend and her feelings of frustration. As a freelance designer without a team, I spend the majority of my time on client projects and very little time on my own passion projects. I love being able to wear many hats but it’s a balancing act that can, unfortunately, often lead to burnout.
I’m very much a work in progress, but I find it crucial to manage my time wisely and to tweak my “processes” when something isn’t working.
How exactly then does one make time for side projects and creative pursuits when there's barely any time to meet client deadlines, make dinner for the family, work out, take classes, etc. etc.?
The answer (I believe) is simple: organize and prioritize. Start by automating tasks and eliminating the ones that do not move the needle for your business. Use the following small (but practical) suggestions to organize your creative biz—from PM tools to automation techniques to general advice—so that you can save some time and do more of the things you love.
What are you waiting for? Let's get started:
**This post contains affiliate links. Click here to learn more.**
1) Set up your projects in Asana, Trello, or any other task manager.
Using a free PM tool will help you delegate tasks, keep track of deadlines, and seamlessly apply the Kanban Technique to any project. If you've never heard of the Kanban approach, it's a popular project management methodology used by software engineers and professionals in tech.
Essentially, Kanban involves separating a board into three columns or lists (i.e. “To Do,” “In Progress,” “Done”) and moving each card—which represents a single task—from left to right as it is put into action. Kanban can be implemented with physical cards or digital "cards," depending on which medium you prefer (see image below):

I personally use Trello as an editorial calendar and a repository for all of my content ideas (or Trello "cards"), including blog post outlines, newsletter ideas, and important checklists.
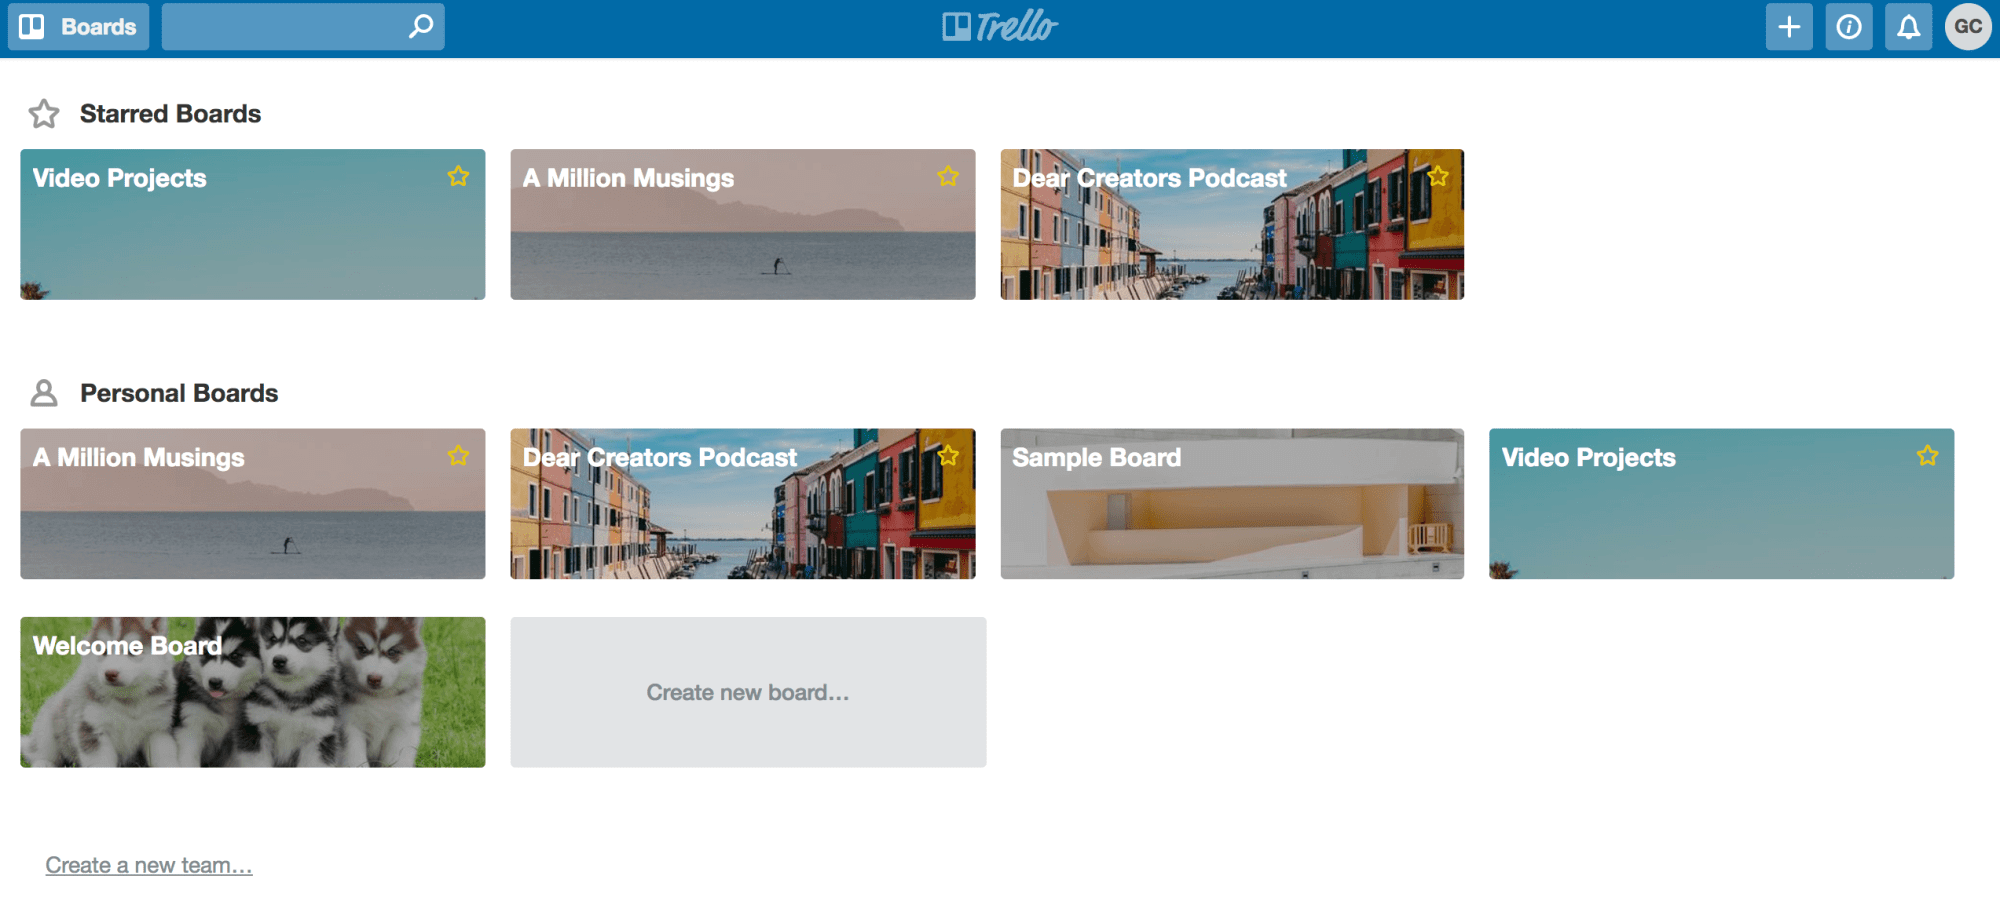
As you can see in the image below, cards can be dragged Kanban-style from one column to the next (e.g. "in progress," "published," "post ideas"). You can also categorize tasks by using color-coded tags (e.g. blue label = "travel blog posts," red label = "recipes," etc.):

Overall, Trello is a useful way to plan out content and organize multiple projects for your business and personal life. If you're constantly traveling from place to place, download the Trello app to your phone so that you can update your projects on-the-go.

Now let's talk Asana. Asana is similar to Trello in that you can drag and drop tasks, assign team members, attach files, and do a lot more. When you create a new project in Asana, you can use "boards" to help you visualize tasks as though they were sticky notes on a whiteboard (see above). If you'd prefer a different option, set up your project in "list view" instead.

You can also view all your scheduled tasks—for all existing projects—on your calendar in Asana. As pictured in the image above, the dashboard (left side) shows you all of my ongoing "projects," as well as the colors I've assigned to each project category (ex: yellow = blog posts for my personal blog).
Unlike Asana, you will need to upgrade your free Trello account or "power-up" to integrate boards into your Trello calendar, which is inconvenient but not necessarily a dealbreaker as you can still assign due dates.
Here's a sample editorial calendar for you to replicate in your own Trello account:
2. Streamline your client process.
If you're a freelancer (in any capacity), think about whether you've established a client process. If you haven't done so yet, write out every step of your client process, from inquiries to offboarding and everything in-between. Once you've taken care of this step, start streamlining your process and automating any recurring tasks.
One simple tip is to create email templates you can use over and over again with the click of a button. In Gmail, these templates are called "canned responses" (see quick tutorial here). Say goodbye to digging through archived emails and copying and pasting responses. This trick alone will save you so much time:

And if you're tired of explaining your packages every time you onboard a new client, speed up the process by creating a welcome packet or welcome video for each service that you offer. Save invoice templates if you have to! Do whatever you can to save time and make your future self less panicked.

Dubsado, my favorite CRM, comes with built-in client invoices and a long list of nifty features such as boards, client portals, automated reminders, and client contract templates. Yes, you will first have to learn how to use the software, but trust me, you'll thank yourself later.
3. Use an online appointment scheduler.

I used to use Acuity mainly for scheduling consultation calls and booking podcast guests but eventually switched to the free version of Calendly, which show clients my hours of availability in their timezone. The biggest benefit of an online scheduler is that freelancers and clients don't have to go back-and-forth via email just to set up one appointment.

Calendly interface
All you have to do is send your clients a link to your schedule, and they'll book a spot on your calendar without having to ask you if you're available. You can also attach a form to your calendar if you need more information from the recipient. Create your account with Calendly if you haven't already!
4. Create content categories.
Figure out the categories or content topics that you’ll cycle through on a regular basis. For instance, my business blog posts tend to fall under the following four categories: 1) productivity/time management 2) creative entrepreneurship 3) tutorials and 4) inspiration.
To give you another example, Youtuber Lilly Singh uploads one “rant” video and one skit video per week. Her rant videos are usually "talking-head" type videos and her comedy skits are, well, skits. (You get the point.)
5. Schedule your social media posts beforehand.
I don't know about you, but social media content creation and marketing can take up a lot of time—time you can devote to the most important aspects of your business (unless social media is your business). While I agree that it's fun to post spur-of-the-moment photos on Instagram, it's also great to have a backlog of pre-scheduled posts when you don't feel like creating new content. This is why I try scheduling and automating my social media posts as much as I can.

my favorite scheduling apps include:
Tailwind for Pinterest
Planoly for Instagram and...
Buffer and/or IFTTT (which stands for "If This, Then That") for Twitter.
The downside to the free version of Buffer is that you can only schedule 10 tweets at a time. If you want to take it up a notch, I highly recommend setting up IFTTT, which is now my preferred way of scheduling and automating an infinite number of tweets—for FREE. IFTTT "applets" or recipes can be used in conjunction with others apps to automate a variety of recurring tasks.
Here's how to schedule and automate tweets with IFTTT & Google Calendar:
Create an account with IFTTT.
Type "Google Calendar" in the search bar, click on it, and then press "Connect."
Search for "Schedule Tweets Using Google Calendar" and click "Turn On." (As described, the applet will "Add Google Calendar entries with 'ScheduleTweet' as the title, and this recipe will tweet the Description.")
Create a new calendar in your Google account specifically for your social media posts.
Add an Event and make sure to title it "ScheduleTweet" (otherwise IFTTT will not get the signal to post your tweet)
Choose the date and time you want the tweet to go up. You can loop the tweet by specifying what days you want the event to repeat.
In the Description box, add the actual content of your tweet. Include a link if needed. (see photo for example)
Save your event and...boom! Your tweet is now scheduled and ready to go.

TIP: There are plenty of other applets on IFTTT.com, so I highly encourage you to check them out when you get a chance! (ex: saving copy of Tweets automatically)
6. Repurpose content, rinse, and repeat.
A great way to "work smarter and not harder" is to repurpose your content across multiple platforms. This can be a real lifesaver and I've been doing more and more of it lately now that my [modest] library of content is growing.
Here are some ways that I've refashioned my content...
Borrowed content from old blog posts and used them in my newsletters (and vice versa).
TIP: Instead of constantly creating new newsletter content, start off your email with an excerpt of a new blog post and link to the post with a "Click link to read more!" (This isn't even repurposing!)
Used newsletter content in my Instagram captions.
Taken snippets of blog posts and turned them into tweetable quotes.
The options are endless, and you don't have to churn out new content every single day. Repurposing content can be good for new visitors who aren't familiar with your work yet.
7. Establish your workflow. (But be flexible!)
As much as I love using apps and tools, what's more important to me is to establish a workflow that I can easily adhere to (and remember) from week to week. While every week looks different, here's an example:
Mondays and Tuesdays: Work on client projects.
Wednesdays: Write blog posts and/or continue personal projects.
Thursdays: Edit content (e.g. blog posts, videos, newsletters, show notes) and make any last-minute revisions.
Fridays: Try to take it easy and focus mainly on administrative tasks, such as social media scheduling, emails, etc.
Choose a day or two to batch tasks and set aside one week out of the month to batch content or social media—or any other recurring tasks!
8. Go analog.
I've said this before, and I'll say this again, but there's something really special about hand-writing your goals. I love digital apps as much as the next millennial, but my first love has and always will be physical planners. Plus, studies have shown that writing down your goals can actually help you achieve them.

Here are some of my recommendations:
Ink + Volt Planner (for weekly planning)
his is my new favorite productivity-boosting planner, and it's unlike any other planner I've used before. Specs include two-page markers, 30-day challenges, weekly goals, monthly goals, journaling prompts, and so many useful templates.
Moleskine Planner (for journaling)
For the past few years, I've used Moleskine's classic 5"x8.25" weekly planner as my journal/diary. I fill out the appointments pages with things I did throughout the week and the ruled pages with my thoughts and personal reflections.
AT-A-GLANCE Weekly/Monthly Planner (for daily planning)
I'm a girl who lives by her planner, and I keep one near me at all times. Although I use calendar apps from time to time, I prefer using physical planners for my daily planning. Something about writing my to-do list by hand is more reassuring than keeping it all in a digital calendar.
or me, AT-A-GLANCE's 5.5"x8.5" weekly/monthly planner does the job! It's affordable and has a simple design.
PRO TIP: Keep a separate list for your primary goals and a separate list for your secondary goals.
9. Focus on consistency and quality (not frequency and quantity).
There was a time when I tried cranking out one blog post per week (for my personal blog), and I eventually grew resentful of blogging. I realized that I needed to find my sweet spot when it came to creating content.
Nowadays, I focus more on creating evergreen content and quality over quantity. Rather than writing several short blog posts per month, I now aim to write at least one value-packed blog post per month that will serve my audience in an intentional way.
That said, if you LOVE writing and do it every day, keep at it by all means!
My general advice is this:
Focus on creating as much value as you can.
Stick to a schedule.
Don't stress out about quantity.
10. Read "How to Be Everything" by Emilie Wapnick! (Just my recommendation.)
“How to Be Everything” by Emilie Wapnick is essentially the Bible for multi-passionates/slashies/polymaths or—as Emilie Wapnick calls them—multipotentialities (“someone with many interests and creative pursuits”). It’s a comprehensive guide on how to make a living as a multipotentialite and how to find the work model that suits you best. If you're someone who refuses to pursue just one job or passion, you will not only appreciate this book but you will also learn ways to make time for your creative projects!
Now that you've got some tips, hacks, and strategies under your belt, start implementing them in your business wherever you can.
Even if you try one of the tips I mention in this blog post, I have no doubt that you will see a difference in your productivity level (for the better, of course!).